For a while I have been wanting to make curtains for our home, especially for the children's bedroom. I was waiting to find out whether our baby was a boy or a girl, because all three kids will share that bedroom for a few months (once the baby is about 8 weeks old, if she's like her sisters were). If we were going to have a son I didn't want to make the curtains girly.
So the kids I went to ReStore this past weekend to search for rods for the two bedrooms and/or the living room. There was just one that would work, and the woman at the cash register told me I could just have it! It's not real attractive but the plan was to have the top of the curtain cover it up anyway. I was willing to pay a few bucks, but it was free!
The next step was to buy fabric. Shboogoo and I went last night to JoAnn with a 40% off coupon and one of the pillowcases that we needed to coordinate with. Here is what each comforter and pillowcase looks like (Shboogoo was in the bed when I took the picture); the bunkbeds are white wood.


It was hard to pick a fabric (I didn't want it to be too colorful or too pastel, and I didn't want pink), but this green and white floral one was the winner. It cost me less than $7, which means that this whole project cost less than $7.

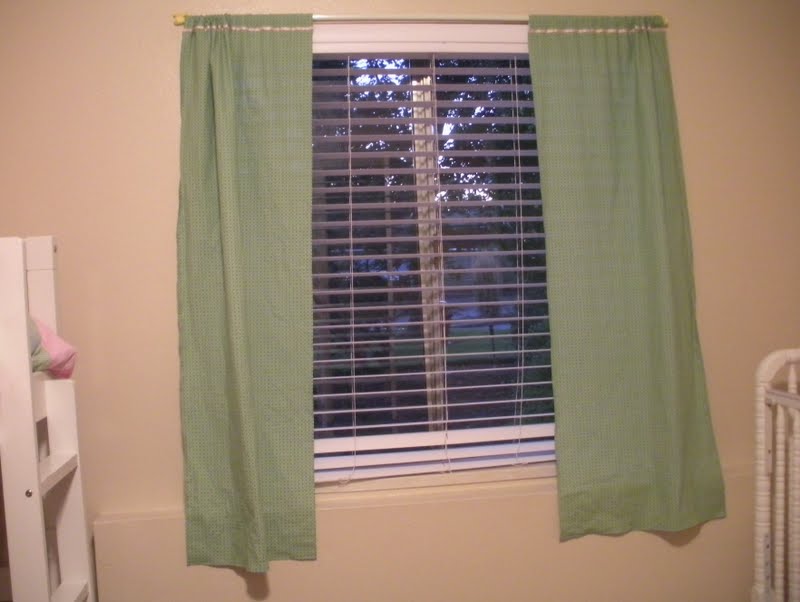
I had measured the window, but it turns out that I should have bought two cuts of fabric instead of one, because the width that it came in was only 43". The curtains don't cover the whole window, but they will be okay. I washed the fabric, started and finished the project pretty quickly today! I'd never made curtains before but they're just a rectangle, so they're a lot easier than diapers, training pants, and jumpers. It was nice to be able to cut straight lines using the edges of a row of flowers. I folded the sides and bottom edge over just 1/4 inch and sewed with a zigzag stitch. I used lavender thread but that color really isn't noticeable. At the top I folded it toward the back without measuring -- it was maybe two inches but I just picked a row of flowers and pinned it in place. This was for the curtain rod to go through. When I sewed it I also sewed through a pink ribbon (which I had in one of my craft drawers) to add an interesting detail. Finally, I put the rod through the panels, hung it up, and tied wide yellow ribbon on the ends to cover the rod's ugliness. All done! I'm glad our girls' room can be a little darker now when they sleep.
 |
| rod before (blurry picture, sorry) |
 |
| rod after |

Turned out very well. I'm surprised you were able to finish them so fast!
ReplyDeletehey, good job!! it looks like you put them on a rod after all. in our living room, i drilled holes into the walls. on the short window, there are four holes holding up the rod. on the long window, there are six holes because i put a little hook in the middle of the rod to make it so that it wouldn't sag. so far, housing has been pretty easy on us. i requested paint so that i can patch holes and bumps that we accidentally make while living here. hopefully the holes will be easy to patch when we take the curtains down when moving!
ReplyDeleteNicely done! It's fun to walk in a room and see the things you have created. Great to see an update on your family!
ReplyDelete